I’ve replaced the inner instruction-dispatch loop of a running SqueakJS virtual machine with a handwritten WebAssembly (WASM) function, and run several thousand instructions of the Caffeine object memory. The WASM module doesn’t yet have its own memory. It’s using the same JavaScript objects that the old dispatch loop did, and the supporting JS state and functions (like Squeak.Interpreter class). I wrote a simple object proxy scheme, whereby WASM can use unique integer identifiers to refer to the Smalltalk objects.
Because of this indirection, the current performance is very slow. The creation of an object proxy is based on stable object pointer (OOP) values; young objects require full garbage collection to stabilize their OOPs. There is also significant overhead in calling JavaScript functions from WASM. At this stage, the performance penalties are worthwhile. We can verify that the hybrid JS/WASM interpreter is working, without having to write a full WASM implementation first.
a hybrid approach
My original approach was to recapitulate the Slang experience, by using Epigram to decompile the Smalltalk methods of a virtual machine to WASM. I realized, though, that it’s better to take advantage of the livecoding capacity of the SqueakJS VM. I can replace individual functions of the SqueakJS VM, maintaining a running system all the while. I can also switch those functions back and forth while the system is running, perhaps many millions of instructions into a Caffeine session. This will be invaluable for debugging.
The next goal is to duplicate the object memory in a WASM memory, and operate on it directly, rather than using the object proxy system. I’ll start by implementing the garbage collector, and testing that it produces correct results with an actual object memory, by comparing its behavior to that of the SqueakJS functions.
Minimal object memories will be useful in this process, because garbage collection is faster, and there is less work to do when resuming a snapshot.
performance improvement expected
From my experiment with decompiling a Smalltalk method for the Fibonacci algorithm into WASM, I saw that WASM improves the performance of send-heavy Smalltalk code by about 250 times. I was able to achieve significant speedups from the targeted use of WASM for the inner functions of BitBLT. From surveying performance comparisons between JS and WASM, I’m expecting a significant improvement for the interpreter, too.
With the JavaScript bridge in SqueakJS, we can utilize built-in web browser behavior and other JS frameworks from Smalltalk, just as any other JS code would. I’ve used it to build Caffeine apps using A-Frame and croquet.io. Another useful framework we can integrate is WebAssembly (WASM), a stack-oriented instruction set for writing high-performance code. I have begun to identify performance-critical code in the SqueakJS virtual machine, and replace it with WASM code. The initial results are encouraging and useful.
identifying hotspots
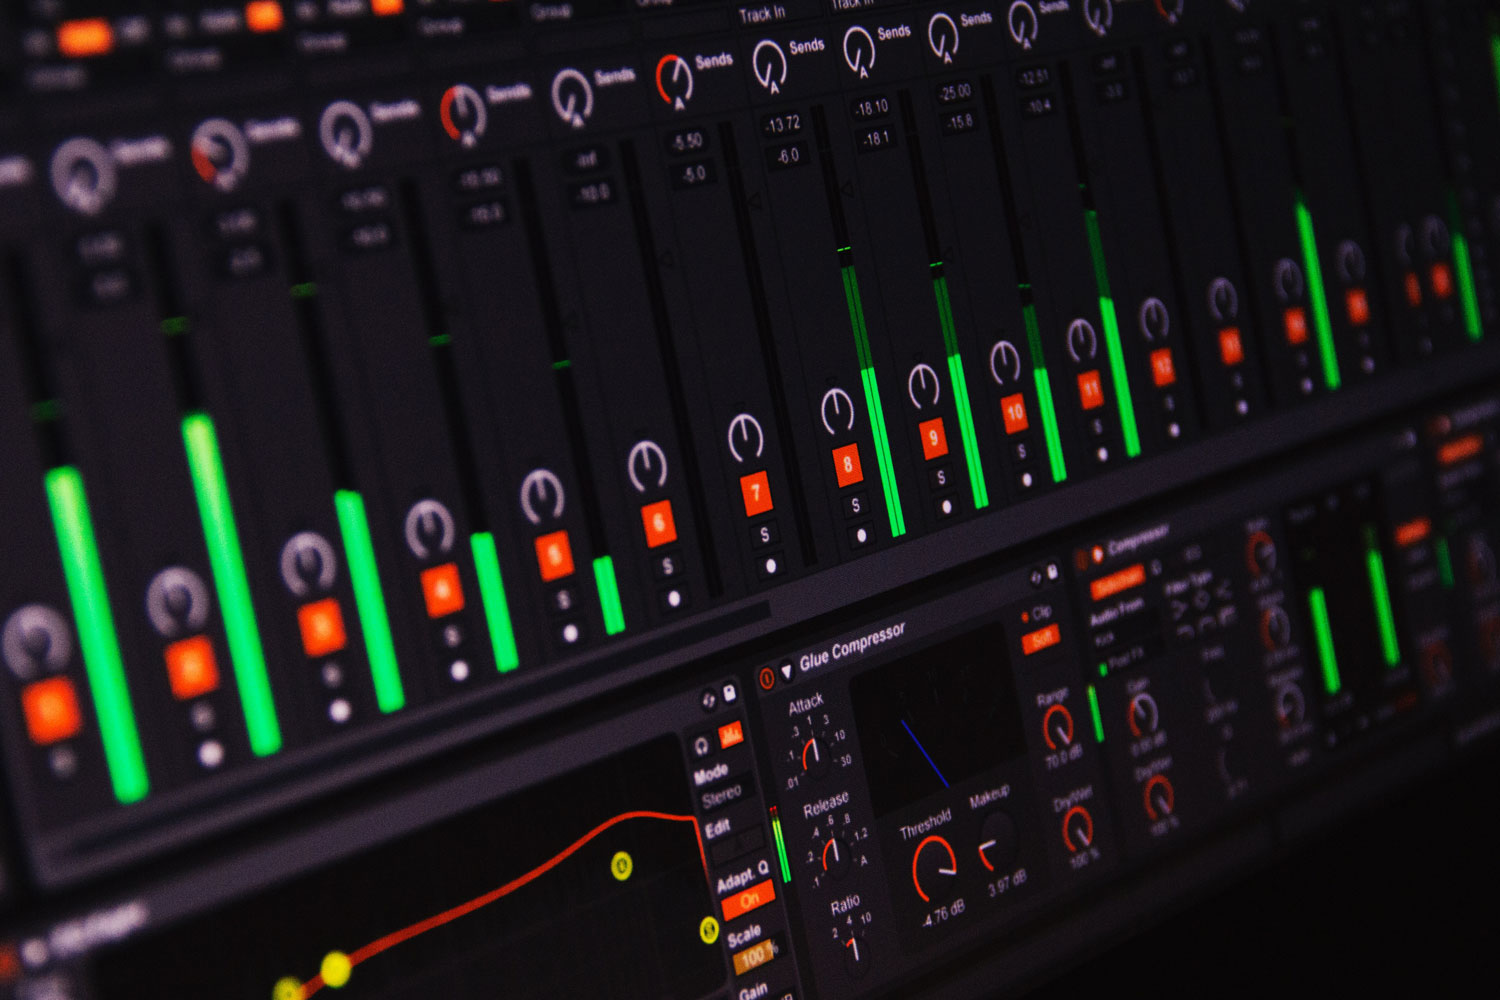
I’m running SqueakJS in the Chrome web browser. To identify virtual machine code that consumes the most time, I profile use cases that seem slow, using Chrome’s built-in devtools. The first use case I chose was drag-selecting a large quantity of text in a workspace.
a performance capture of drag-selecting text, indicating that rgbMulwith() is the most time-consuming inner BitBLT function
From reviewing a performance capture of this use case, we can see that rgbMulwith() is the most time-consuming inner function from the BitBLT plugin. While it doesn’t modify variables in outer scopes, it does read a plugin-global variable. Most of the work it does, however, is done by partitionedMulwithnBitsnPartitions(), a pure function returning the result of a mathematical operation on the inputs, without any other system state interaction. That makes it well-suited to WASM implementation.
While there are APIs for coordinating side effects with JavaScript, they are relatively slow. It is therefore harder to rationalize WASM implementations of individual higher-level Squeak virtual machine primitives, since they interact extensively with complex JavaScript objects like the Squeak interpreter. Eventually, we’ll represent the entire Squeak object memory inside a WASM memory, and implement the entire Squeak virtual machine with WASM functions. WASM garbage collection will assist the Squeak garbage collector, much as the JavaScript garbage collector assists the SqueakJS VM now. JavaScript interaction will be limited to the WASM implementation of the SqueakJS JS bridge.
translating from JS to WASM
Here’s the existing JS implementation of partitionedMulwithnBitsnPartitions():
With its stack-based instructions, WASM code is reminiscent of Smalltalk bytecode. Here’s some of the equivalent WASM implementation of the above function, written by hand. The WASM memory holds the maskTable from BitBitPlugin.js.
a section of the equivalent WASM
Note that WASM’s shift-left and shift-right instructions are fine as is; we don’t need to make wrapper functions for them as we did in JS.
After I modified the BitBLT plugin so that rgbMulwith() uses partitionedMUL(), drag-selecting text in the Caffeine user interface was much more responsive, and a different inner BitBLT plugin function was the most time-consuming. Even though rgbMulwith() used a small percentage of total time in the first performance capture, every saved millisecond significantly improves perceived animation smoothness. By using additional use cases (scrolling long lists, and repainting by alternating the stacking order of two windows), I identified other inner BitBLT plugin functions to optimize. The Caffeine user interface is now much more responsive than it was. This is especially useful with Worldly, the spatial IDE I’m building with Caffeine and A-Frame, where every bit of performance matters.
an alternative to writing WASM by hand
For the JS code in the Squeak virtual machine, it makes sense to write replacement WASM code by hand. Since WASM code is so similar to Smalltalk bytecode, for Smalltalk compiled methods it makes more sense to use automated decompilation to WASM. I have done this for a small proof-of-concept, using a Smalltalk compiled method for the Fibonacci algorithm.
Using the Smalltalk compiler and decompiler I wrote with my Epigram parsing framework, I was able to decompile the Smalltalk compiled method for the Fibonacci algorithm into WASM text. I then used an in-browser version of the WebAssembly Binary Toolkit from Caffeine to generate binary WASM, compile it in the current page as a function, and call the function. Comparing the execution time of finding the 29th Fibonacci number in both Smalltalk and WASM showed that WASM had 250 times the execution speed of the normal SqueakJS bytecode-to-JS translator.
I plan to write, in Smalltalk, a version of the Squeak virtual machine simulator that stores all objects in a WASM memory. Once it can evaluate (3 + 4), I’ll translate all its Smalltalk compiled methods to WASM, and see how much faster it runs. The next step will be to get a JS bridge working, and implement interfaces to the web browser DOM for graphics and user input event handling. Ultimately, a WASM implementation of the Squeak virtual machine may be preferable to the SqueakJS virtual machine.
In a traditional EBNF grammar, production rules describe all the allowed relationships between a language’s terminal symbols. By expressing them as live objects with behavior, they can parse and compile as well. They form a definitive reference network in which to record parsed terminals, making them ideally suited as parse trees. Individual rules also function as search terms in other rules which use them. Epigram is a framework for doing this. Let’s explore these features with an example.
Each diagram shows a path going through one or more symbols. An EBNF production rule, or grammar symbol, is indicated by the name of the rule in a box. A terminal symbol is indicated by a circle with the symbol inside. An alternation is indicated by a path’s divergence through multiple symbols, converging afterward. A compound rule is indicated by a path going directly through multiple symbols. A repetition is indicated by a loop through a sequence of symbols, representing one or more occurrences of that sequence. EBNF also supports the option, which is no or one occurrence of a symbol, and the difference, which matches one rule but not another. These kinds of rules are sufficient for the Smalltalk grammar. There are other grammars, like XML, that extend BNF further, but we won’t discuss them here.
production rules as code
We can express these diagrams as code. For a terminal symbol, we can use a literal string. For an alternation, we can use a “|” (“or”) operator. For a compound rule, we can use a “||” (“then”) operator (after changing the Smalltalk compiler so that it doesn’t confuse “||” with “|”). For repetitions and options, we can use the unary messages “repetition” and “option”. We can store entire production rules as shared variables (pool variables in Squeak).
Digit is an instance of class Alternation, and can be a variable in a SmalltalkProductionRules pool. We can write the second diagram as:
Digits := Digit repetition.
Digits is an instance of class Repetition. A rule which uses a compound rule is:
SymbolConstant := '#' || Symbol.
We can write each rule in this way, culminating with Method.
parsing
Once we’ve created all the rules for our grammar, we can ask the topmost rule, Method, to parse the source code of a method. To parse, a rule creates a stream on the proposed content, and attempts to accept the next character in the stream until the stream is empty. For example, a terminal symbol for ‘3’ will accept the next character if it is $3.
A symbol which consists of other symbols will delegate parsing to those symbols. An alternation between the terminal symbols for ‘3’ and ‘4’ will accept the next character if it is $3 or $4, but it decides this by delegating the parse to each of those symbols, and noting which of them was able to accept the next character. A symbol’s parse succeeds if it is able to accept enough characters to match every character in its string, if it’s a terminal symbol, or a sufficient set of subsymbols, if it’s a compound rule, alternation or repetition.
If a symbol doesn’t succeed, it fails and resets the stream’s position as it was before parsing began. Control is returned to the delegating symbol. This is called backtracking. If the overall parse backtracks all the way to the topmost rule without having emptied the stream, and the next character is unacceptable, then the entire parse fails and the content is ungrammatical. Having reached this point, however, we have information about which rules failed and how far the parse got in the stream. This is useful information to present to the user, with an exception.
The complexity of a grammar can make backtracking very expensive in time; reducing this cost is the main challenge in Epigram development currently. Informed choices of alternation orders in a grammar (as with a parsing expression grammar) and primitives (described below) yield dramatic performance increases.
compilation
If a parse is successful. We are left with a graph of successful production rules, each with a record of the characters it accepted, and its successful constituent symbols. We can use this graph as we would have used a traditional parse tree. Compilers can use the parse graph to create objects representing the source content in a useful structure. For example, we can create a CompiledMethod of Smalltalk virtual machine instructions, embodying the behavior specified by the source code.
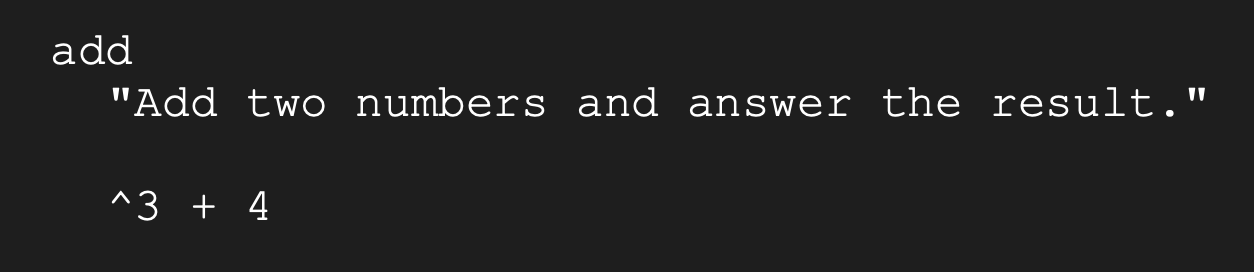
For example, if our source code were:
The successful rules in our parse, in chronological order, would be:
Letter ($a)
Letter ($d)
Letter ($d) — further Letter successes are elided.
Identifier (‘add’)
UnarySelector (‘add’)
MessagePattern (‘add’)
SpecialCharacter (carriage return)
SpecialCharacter (tab)
Comment (‘”Add two numbers and answer the result.”‘)
Digit ($3)
Number (‘3’)
Literal (‘3’)
SpecialCharacter ($+)
BinarySelector (‘+’)
Literal (‘4’)
BinaryExpression (‘3 + 4’)
MessageExpression (‘3 + 4’)
Expression (‘3 + 4’)
Statements (‘3 + 4’)
Method (‘add “…” ^3 + 4’)
To get the intended method selector (#add), a compiler holding this parse history can simply ask the Method rule for its MessagePattern. The compiler can also ask the Expression to generate the Smalltalk stack machine instructions that carry it out.
searching
Since MessagePattern is a well-known shared variable in the SmalltalkProductionRules pool, the compiler can use it as a search term in queries to Method:
selector := (Method at: MessagePattern) terminals
Using production rules as search terms is a very useful way of navigating the grammatical structure of the parse tree, allowing the compiler writer to apply their knowledge of the grammar. Rather than focusing on how parsing works, or how to manipulate a parse tree which is separate from the grammar, one may express compilation entirely with the grammar’s rules.
performance optimization: primitives
It’s very convenient and clear to express a grammar as EBNF rules, but it can lead to alternations between many options, with expensive parsing behavior. Since the grammar keeps a complete history of the accepted rules for a parse, we can easily see which rules are most popular and consume the most time. For these rules, we can specify Smalltalk code equivalent to their parsing work, providing primitives. For XML, which has frequently-used alternations between thousands of Unicode characters, primitives provide speedups of 200 times or more.
enforcing constraints
Some grammars specify additional constraints on parsed content. For example, the HTML grammar requires an element’s opening and closing tags to match. Epigram supports adding constraints to production rules, in the form of block closures which must evaluate to true after parsing has taken place.
resolving ambiguities
Some grammars include points of intentional ambiguity. In Smalltalk, for example, there’s a grammatical ambiguity between chains of unary and binary messages. Epigram supports noting ambiguities, and resolving them through constraints. In the Smalltalk example, the ambiguity is resolved through constraint considering the scope in which parsing occurs. Which variable names are currently bound, and which unary and binary messages are actually defined, lead to a single interpretation.
decompilation
Writing a Smalltalk decompiler with reified production rules is also easier. The rule for a method declaration can dispatch decompilation for each bytecode to the corresponding instruction class, resulting in a set of equivalent instruction instances. An instruction which pops the virtual machine stack corresponds to a Smalltalk statement, and it can construct a structure of production rules equivalent to that statement, as if created from a parse. The rule structure can answer terminal symbols which are the equivalent source code. I’m writing an extended example of this decompilation process, as an Observable active essay with a live Caffeine session embedded inside it.
special thanks
Special thanks to Chris Thorgrimsson and Lam Research, for supporting this open-source work through commercial use cases.
I’ve written a Caffeine class which, in real time, takes detected pitches from a melody and chords, and sends re-voiced versions of the chords to a harmonizer, which renders them using shifted copies of the melody. It’s an example of an aggregate audio plugin, which builds a new feature from other plugins running in Ableton Live.
re-creating a classic
Way way back in 1991, before the Auto-Tune algorithm popularized in 1998, a Canadian company called IVL Technologies developed a hardware harmonizer, the Vocalist VHM5. It generated five-part vocal harmonies, live from sung melodies and chords played via MIDI. It had a simple but effective model of vocal formants, which enabled it to shift the pitch of a sung note to natural-sounding new pitches, including correcting the pitch of the sung note. It also had very fast pitch detection.
My favorite feature, though, was how it combined those features when voicing chords. In what was called “vocoder mode”, it would adjust the pitches of incoming MIDI chords to be as close as possible to the current pitch of a sung melody, or closed voicing. If the melody moved more than half an octave away from a chord voice, the rendered chord voice would adjust by some number of octaves up or down, so as to be within half an octave of the melody. With kinetic melodies and dense chords, this becomes a simple but compelling voice-leading technique. It’s even more compelling when the voices are spatialized in a stereo or 3D audio field, with reverb, reflections, and other post-processing.
It’s also computationally inexpensive. The IVL pitch-detection and shifting algorithms were straightforward for off-the-shelf digital signal processing chips to perform, and the Auto-Tune algorithm is orders of magnitude cheaper. One of the audio plugins I use in the Ableton Live audio environment, Harmony Engine by Antares, implements Auto-Tune’s pitch shifting. Another, MIDI Guitar by Jam Origin, does polyphonic pitch detection. With these plugins, I have all the live MIDI information necessary to implement closed re-voicing, and the pitch shifting for rendering it. I suppose I would call this “automated closed-voice harmonization”.
implementation
Caffeine runs in a web browser, which, along with Live, has access to all the MIDI interfaces provided by the host operating system. Using the WebMIDI API, I can receive and schedule MIDI events in Smalltalk, exchanging music information with Live and its plugins. With MIDI as one possible transport layer, I’ve developed a Smalltalk model of music events based upon sequences and simultaneities. One kind of simultaneity is the chord, a collection of notes sounded at the same time. In my implementation, a chord performs its own re-voicing, while also taking care to send a minimum of MIDI messages to Live. For example, only the notes which were adjusted in response to a melodic change are rescheduled. The other notes simply remain on, requiring no sent messages. Caffeine also knows how many pitch-shifted copies of the melody can be created by the pitch-shifting plugin, and culls the least-recently-activated voices from chords, to remain within that number.
All told, I now have a perfect re-creation of the original Vocalist closed-voicing sound, enhanced by all the audio post-processing that Live can do.
the setup
a GK-3 hex pickup through a breakout box
Back in the day, I played chords to the VHM5 from an exotic MIDI electric guitar controller, the Zeta Mirror 6. This guitar has a hex (six-channel) pickup, and can send a separate data stream for each string. While I still have that guitar, I also have a Roland GK-3 hex pickup, which is still in production and can be moved between guitars without modifying them. Another thing I like about hex pickups is having access to the original analog signal for each string. These days I run the GK-3 through a SynQuaNon breakout module, which makes the signals available at modular levels. The main benefit of this is that I can connect the analog signals directly to my audio interface, without software drivers that may become unsupported. I have a USB GK-3 interface, but the manufacturer never updated the original 32-bit driver for it.
Contemporary computers can do polyphonic pitch detection on any audio stream, without the use of special controller hardware. While the resulting MIDI stream uses only a single channel, with no distinction between strings, it’s very convenient. The Jam Origin plugin is my favorite way to produce a polyphonic chord stream from audio.
the ROLI Lightpad
My favorite new controller for generating multi-channel chord streams is the ROLI Lightpad. It’s a MIDI Polyphonic Expression (MPE) device, using an entire 16-channel MIDI port for each instrument, and a separate MIDI channel for each note. This enables very expressive use of MIDI channel messages for representing the way a note changes after it starts. The Lightpad sends messages that track the velocity with which each finger strikes the surface, how it moves in X, Y, and Z while on the surface, and the velocity with which it leaves the surface. The surface is also a display; I use it as a five-by-five grid, which presents musical intervals in a way I find much more accessible than that of a traditional piano keyboard. There are several MPE instruments that use this grid, including the Linnstrument and the GeoShred iPad app. The Lightpad is also very portable, and modular; many of them can be connected together magnetically.
The main advantage of using MPE for vocal harmonization is associating various audio processing state with each chord voice’s separate channel. For example, the bass voice of a chord progression can have its own spatialization and equalization settings.
My chord signal path starts with an instrument, a hex or normal guitar or Lightpad. Audio and MIDI data goes from the instrument, through a host operating system MIDI interface, through Live where I can detect pitches and record, through another MIDI interface to Caffeine in a web browser, then back to Live and the pitch-shifting plugin. My melody signal path starts with a vocal performance using a microphone, through Live and pitch detection, then through pitch shifting as controlled by the chords.
Let’s Play!
Between this vocal harmonization, control of the Ableton Live API, and the Beatshifting protocol, there is great potential for communal livecoded music performance. If you’re a livecoder interested in music, I’d love to hear from you!
Livecoding access can tame the complexity of Ableton Live.
I’ve written a proxy system to communicate with Ableton Live from Caffeine, for interactive music composition and performance. Live includes Max for Live (M4L), an embedded version of the Max media programming system. M4L has, in turn, access to both Node.JS, a server-side JavaScript engine embedded as a separate process, and to an internal JS engine extension of its own object system. Caffeine can connect to Node.JS through a websocket, Node.JS can send messages to Max, Max can call user-written JS functions, and those JS functions can invoke the Live Object Model, an API for manipulating Live. This stack of APIs also supports returning results back over the websocket, and for establishing callbacks.
getting connected
Caffeine creates a websocket connection to a server running in M4L’s Node.JS, using the JS WebSocket function provided by the web browser. A Caffeine object can use this connection to send a JSON string describing a Live function it would like to invoke. Node.JS passes the JSON string to Max, through an output of a Max object in a Max program, or patcher:
connecting the Node.JS server with JS Live API function invocation
Max is a visual dataflow system, in which objects inputs and outputs are connected, and their functions are run by a real-time scheduler. There are two special objects in the patcher above. The first is node.script, which controls the operation of a Node.JS script. It’s running the Node.JS script “caffeine-server.js”, which creates a websocket server. That script has access to a Max API, which it uses to send data through the output of the node.script object.
The second special object is js, which runs “caffeine-max.js”. That script parses the JSON function invocation request sent by Caffeine, invokes the desired Live API function, and sends the result back to Caffeine through the Node.JS server.
proxying
With this infrastructure in place, we can create a proxy object system in Caffeine. In class Live, we can write a method which invokes Live functions:
invoking a Live function from Caffeine
This method uses a SharedQueue for each remote message sent; the JS bridge callback process delivers results to them. This lets us nest remote message sends among multiple processes. The JSON data identifies the function and argument of the invocation, the identifier of receiving Live object, and the desired Smalltalk class of the result.
The LiveObject proxy class can use this invoking function from its doesNotUnderstand method:
forwarding a message from a proxy
Now that we have message forwarding, we can represent the entire Live API as browsable Smalltalk classes. I always find this of huge benefit when doing mashups with external code libraries, but especially so with Live. The Live API is massive, and while the documentation is complete, it’s not very readable. It’s much more pleasant to learn about the API with the Smalltalk browsing tools. As usual, we can extend the API with composite methods of our own, aggregating multiple Live API calls into one. With this we can effectively extend the Live API with new features.
extending the Live API
One area of Live API extension where I’m working now is in song composition. Live has an Arrangement view, for a traditional recording studio workflow, and a Session view, for interactive performance. I find the “scenes” feature of the Session view very useful for sketching song sections, but Live’s support for playing them in different orders is minimal. With Caffeine objects representing scenes, I can compose larger structures from them, and play them however I like.
How would you extend the Live API? How would you simplify it?
The Node.JS server, JS proxying code, and the Max patcher that connects them are available as a self-contained M4L device, which can be applied to any Live track. Look for it in the devices folder of the Caffeine repository.
I’ve written a Caffeine app implementation of the Beatshifting algorithm, for collaborative remote music performance that is synchronized and out-of-phase. Beatshifting uses network latency as a rhythmic element, using offsets from beats as timestamps, with a shared metronome and score.
I was inspired to write the Beatshifting app by NINJAM, a similar system that has hosted many hours of joyous sessions. There are a few interesting twists I think I can bring to the technology, through late-binding of audio rendering.
NINJAM also synchronizes distributed streams of rhythmic music. It works by using a server to collect an entire measure of audio from the performers’ timestamped streams, stamps them all with an upcoming measure number, and sends them back to each performer. Each performer’s system plays the collected measures with the start times aligned. In effect, each performer plays along with what everyone else did a measure ago. Each performer must receive audio only by the start of the upcoming measure, rather than fast enough to create the illusion of simultaneity.
Beatshifting gives more control over the session to each performer, and to an audience as well. Each performer can modify not only the local volume levels of the other performers, but also their delays and instruments. Each performer can also change the tempo and time signature of the session. A session can have an audience as well, and each audience member is really a performer who hasn’t played anything yet.
It’s straightforward to have an arbitrary number of participants in a session because Beatshifting takes the form of a web app. Each participant only needs to visit a session link in a web browser, rather than use a special digital audio workstation (DAW) app. By default, Beatshifting uses MIDI event messages instead of audio, using much less bandwidth even with a large group.
To deliver events to each participant’s web browser, Beatshifting uses the Croquet replication service. Croquet is able to replicate and synchronize any JavaScript object in every participant’s web browser, up to 60 times per second. Beatshifting uses this to provide a shared score. Music events like notes and fader movements can be scheduled into the score by any participant, and from code run by the score itself.
One piece of code the score runs broadcasts events indicating that measures have elapsed, so that the web browsers can render metronome clicks. There are three kinds of metronome clicks, for ticks, beats, and measures. For example, with a time signature of 6/8, there are two beats per measure, and three ticks per beat. Each tick is an eighth-note, so each beat is a dotted-quarter note. The sequence of clicks one hears is:
measure
tick
tick
beat
tick
tick
At a tempo of 120 beats per minute, or 240 clicks per 60,000 milliseconds, there are 250 milliseconds between clicks. Each time a web browser receives a measure-elapsed event, it schedules MIDI events for the next measure’s clicks with the local MIDI output interface. Since each web browser knows the starting time of the session in its output MIDI interface’s timescale, it can calculate the timestamps of all ensuing clicks.
When a performer plays a note, their web browser notes the offset in milliseconds between when the note was played and the time of the most recent click. The web browser then publishes an event-scheduling message, to which the score is subscribed. The score then broadcasts a note-played event to all the web browsers. Again, it’s up to each web browser to schedule a corresponding MIDI note with its local MIDI output interface. The local timestamp of that note is chosen to be the same millisecond offset from some future click point. How far in the future that click is can be chosen based on who played the note, or any other element of the event’s data. Each web browser can also choose other parameters for each event, like instrument, volume level, and panning position.
Quantities like tempo are part of the score’s state, and can be changed by any performer or audience member. Croquet ensures that the changed JavaScript variables are synchronized in all the participants’ web browsers.
With so many decisions about how music events are rendered left to each web browser, the mix that each participant hears can be wildly different. The only constants are the millisecond beat offsets of each performer’s notes. I think it’ll be fun to compare recordings of these mixes after the fact, and to make new ones from individual recorded tracks.
There’s no server that any participant needs to set up, and the Croquet service knows nothing of the Beatshifting protocol. This makes it very easy to start and join new sessions.
next steps
The current Beatshifting UI has controls for joining a session, enabling the local scheduling of metronome clicks, and changing the tempo and time signature of a session.
the current Beatshifting UI
If one is using a MIDI output interface connected to a DAW, then one may use the DAW to control instruments, volume, panning, and so on. I’d also like to provide the option of all MIDI event rendering performed by the web browser, and a UI for controlling and recording that. I’ve established the use of the ToneJS audio framework for rendering events, and am now developing the UI.
I led a debut performance of Beatshifting as part of the Netherlands Coding Live concert series, on 23 April 2021.
I’ve written an animated 3D visualization of the Beatshifting algorithm, which can be driven from live session data. This movie is an annotated slow-motion version:
visualizing the Beatshifting algorithm
I’m excited about the creative potential of Beatshifting sessions. Please contact me if you’re interested in playing or coding for this medium!
Naiad keeps livecoders informed of their teammates activity, and remembers all history.
topology established
Naiad is Caffeine‘s live module system. The goal is to support live versioning of classes and methods as they are edited, from connected teams of developers using Smalltalk or JavaScript IDEs from web browsers and native apps. Naiad keeps each developer informed of events meaningful to their teams and work. It’s comparable to a mashup of GitHub and Slack, and will interoperate with them as well.
The current Naiad prototype uses a relay network of NodeJS servers, each with Caffeine running in a Web Worker thread, and each serving a set of Caffeine-based client IDEs, in web browsers and native apps. The workers keep track of class and method versions, system checkpoints, and teams, using the relays to broadcast events to clients. Clients can request various services of the workers, like joining teams and making checkpoints from object memory snapshots.
These two clients are connected to the same relay server. The client on the left created a new team, by sending a message to the relay’s worker. The worker created the team, and told the relay to notify all of its peers (clients and relays). For now, clients respond by inspecting the new team.
I’ve just made the first system checkpoint, and broadcast the first team event (the creation of a team). Eventually, Naiad will support events for several services, including team chatting and screen-sharing, history management, and application deployment. I’m still eager to hear what events and services you think you would want in a livecoding notification system; please let me know! I expect the first public release of this work to be part of the second 2019 solstice release, on 22 December.
run headlessly in a web browser worker thread, NodeJS server worker thread, or NodeJS main thread.
We have all the components we need to connect teams of livecoders, sharing information from their IDEs as they work. What information would we like to share?
proactive conflict resolution
I’d like to share information that makes code integration easier, by spreading awareness of potential conflicts as soon as possible. Imagine, for example, that you’ve found a bug in a longstanding system method, and decide to start editing it. Before the commit of your change (which may still be days or weeks away), someone else on your team also happens to start editing that method. Wouldn’t it be nice to know that both of you are interested in changing the method?
If both of you are connected to a team network, your IDEs can notify each other when a potential conflict situation like this begins, and the two of you can resolve it through discussion. Such a feature could be vital in a team where responsibility for methods and classes is clearly and completely divided between authors.
The servers in this network can provide history services, too, acting as repositories of all the versions of methods and classes that have been committed by team members. This could aid in unit testing, sharing of works-in-progress, and deployment.
How would you use it?
How would you like to use such a system? How would your needs change when acting as a developer, or as a manager? I’m writing a specification now, and would love to hear your thoughts. Thanks!
Pharo 7 running on the SqueakJS virtual machine in Chrome, debugged by Squeak in a DevTools panel
I’ve updated Caffeine to run Pharo 7; please try it out! There was one virtual machine bug (primitivePerformWithArguments wasn’t manipulating the stack correctly), and I had to turn off a few Pharo features (like libGit support, which uses LibC, something I haven’t faked in the virtual machine yet).
Many thanks to the Pharo hackers in the RMOD team at INRIA Lille, for hosting me at their sprint on Friday, 27 September 2019. It was great hanging out and coding with you all. We’ll get that Pharo Apple Watch screenshot soon. :)
With the latest version of the Caffeine Chrome extension, you can run Caffeine in a Chrome DevTools panel, with access to all the Chrome debugging APIs. I’ve been using it to explore the Netflix video player, for an app I’m writing that enables the viewer to edit narratives by rearranging scenes.
From a quick look at the DOM element tree for the player, it’s apparent that it’s a React app. By following a reference chain from a user interface element (like the skip-forward button), through the bound “this” object of its click-event listener, I found the internal React properties for all the player’s UI elements, and all the player functions they use (for example, for seeking forward in a video).
With those functions in hand, I made a Netflix player class in Smalltalk, which can manipulate the Netflix player React app interactively from Smalltalk code. Other objects I made representing show elements (like scenes, episodes, seasons, and series) can use my player to compile analytic information about shows, and present them in different ways. For example, you could watch an episode of Better Call Saul consisting only of scenes that include a certain character, or that take place at a certain location, or with flashbacks placed in chronological order. This is for a webapp I’m writing called Arc.
I’m eager to see what else you explore using the Caffeine extension in the DevTools!